The journey from a meticulously crafted design to functional, production-ready code has historically been a major bottleneck in web development. This handoff process is often manual, time-consuming, and prone to translation errors that compromise the original vision. DesignToCodeAI is engineered to eliminate this friction, empowering creators to convert any design into high-quality code in minutes. This guide will show you exactly how to use DesignToCodeAI to streamline your workflow and accelerate your development cycle.
In This Guide, You’ll Learn:
- How to perform your first conversion in three simple steps.
- The best input formats (Image, URL, Figma) to use for maximum accuracy.
- How to choose between production-ready HTML and Elementor JSON outputs.
- Advanced techniques for refining AI-generated code to achieve pixel-perfect results.
By leveraging a sophisticated multi-agent AI system, this platform analyzes every pixel, component, and layout choice to generate clean, semantic HTML with Tailwind CSS or ready-to-import Elementor Template JSON files. Whether you’re a freelance designer, a WordPress developer, or a product manager leading rapid prototyping, mastering this tool can fundamentally change how you build for the web.
Table of Contents
- Getting Started: Your First Conversion in 3 Simple Steps
- Mastering Your Input: A Deep Dive into Conversion Types
- Choosing Your Output: HTML vs. Elementor Template
- Advanced Techniques for Pixel-Perfect Results
- Understanding the Points System and Pricing
- Technical Deep Dive: Code Quality, SEO, and Privacy
- Frequently Asked Questions
Getting Started: Your First Conversion in 3 Simple Steps
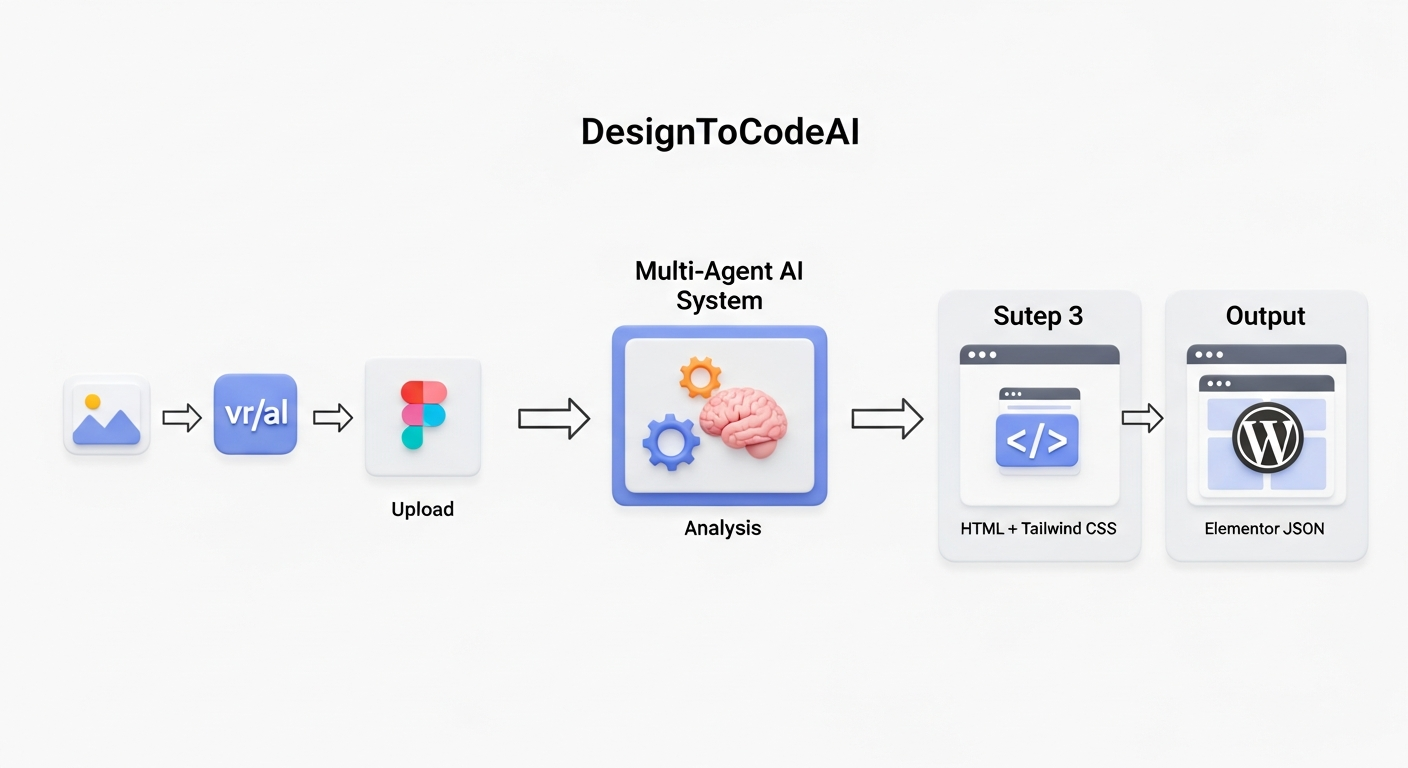
DesignToCodeAI simplifies the entire design-to-code process into an intuitive, three-step workflow. This approach ensures that users of all skill levels can quickly get started and achieve impressive results without a steep learning curve. The core principle is to provide a clear path from your initial design concept to a tangible, usable code asset.
Step 1: Preparing and Uploading Your Design or URL
The first step is providing the AI with your source material. The platform is designed for maximum flexibility, accepting a variety of inputs. You can upload design images or screenshots directly in PNG or JPG format, with a generous file size limit of up to 20MB. For best results, it’s crucial to use high-resolution images where all design elements are clear and legible.
Pro Tip: For the highest accuracy, flatten all layers and remove any hidden or commented-out elements in your design file (e.g., in Figma) before exporting the image. The AI analyzes what it sees, so a clean visual input leads to cleaner code.
A common workflow for designers is to export mockups directly from popular tools like Figma, Adobe XD, or Sketch. Simply save your frame or artboard as a high-quality image and upload it. Alternatively, one of the platform’s most powerful features is the ability to process live website URLs. You can input any website’s address to either replicate its structure or initiate a complete, modern redesign, making it an invaluable tool for inspiration and renovation projects.
Step 2: Configuring the AI for Optimal Conversion
Once your input is uploaded, you need to tell the AI what you want it to create. This involves two key decisions: the output format and the refinement level. You can choose to generate either a single, self-contained HTML file styled with Tailwind CSS or an Elementor Template JSON file specifically for WordPress sites.
Next, you can customize preferences like the AI iteration count. Iterations are refinement cycles where the AI reviews and improves its own output. Selecting a higher number of iterations can significantly increase the accuracy of the final code, especially for complex or nuanced designs. This setting allows you to balance speed with precision, depending on your project’s needs.
Step 3: Reviewing, Refining, and Exporting Your Code
After the AI completes its conversion process, you are presented with an advanced live preview. This engine allows for fast rendering and real-time visualization of the generated output. You can inspect the code, check its responsiveness, and ensure it matches your original design. If the result isn’t perfect, you can make further refinements using additional instructions or by re-running the conversion with more iterations.
Once you are satisfied, you can copy the code directly to your clipboard or use the Cloud Export System to download a bundled project. It is important to note that, for security and privacy reasons, neither your uploaded designs nor the generated code are stored on the servers. All data is processed temporarily, so be sure to save your final code before exiting the session.
Mastering Your Input: A Deep Dive into Conversion Types
The quality of your output is directly influenced by the quality and type of your input. Understanding how to best utilize each supported format will unlock the full potential of DesignToCodeAI and ensure you achieve the highest level of accuracy in your conversions.
From Static Images and Screenshots (PNG/JPG)
Using static images is the most straightforward method. This is perfect for converting hand-drawn wireframes that have been scanned, low-fidelity mockups, or screenshots of existing applications or website components. The AI’s design parsing system is optimized to detect layouts, fonts, and color schemes from these images. For the most accurate results, ensure your image is well-lit, not skewed, and captures the design at its intended resolution.
From Design Tool Exports (Figma, Sketch, Adobe XD)
This is the preferred workflow for most UI/UX designers and product teams. Exporting directly from a design tool like Figma guarantees a high-fidelity, pixel-perfect source image for the AI to analyze. This eliminates any potential for distortion or quality loss. When exporting, choose a high-resolution format (like PNG at 2x) to provide the AI with the maximum amount of detail. This method is ideal for converting complex user interfaces into production-ready code.
From a Live Website URL for Redesign or Inspiration
The Website URL Input Processing feature is a game-changer for modernization projects and competitive analysis. By simply providing a URL, you can instruct the AI to perform one of two actions:
- Replication: The AI will analyze the live site’s structure, layout, and styling to generate a new HTML or Elementor template that closely matches it.
- Redesign: This option uses the source URL for context and inspiration but generates a completely fresh, modern, and professional layout. It’s an incredibly fast way to visualize a modern overhaul of an outdated website.
This functionality is perfect for agencies looking to pitch a redesign or developers who need to quickly build a new site based on an existing one.
| Input Type | Best For | Key Considerations |
|---|---|---|
| Image/Screenshot (PNG, JPG) | Quick mockups, converting non-digital designs, or capturing single components from an existing app. | Use high-resolution, clear, and un-skewed images. Complex layouts might require more AI refinement. |
| Design Tool Export (Figma, etc.) | High-fidelity UI/UX designs, professional development workflows, and multi-component pages. | Export at a high resolution (e.g., 2x). For complex Elementor templates, export and convert each major section separately. |
| Website URL | Modernizing an old website, creating a new design based on inspiration, or quickly scaffolding a project based on a live site. | You can choose between direct replication or a complete ‘Redesign’ for a fresh, modern interpretation. |
Choosing Your Output: HTML vs. Elementor Template
DesignToCodeAI provides two distinct output formats, each tailored to different development environments and project requirements. Selecting the right one is essential for a seamless integration into your workflow.
When to Choose Production-Ready HTML with Tailwind CSS
The HTML output option generates a single, clean HTML file with embedded Tailwind CSS. This format is ideal for a wide range of applications:
- Static Websites: Perfect for landing pages, portfolios, or marketing sites that don’t require a complex backend.
- Custom Development: Provides a clean, semantic starting point for developers building custom web applications with frameworks like React, Vue, or Angular.
- Rapid Prototyping: Quickly generate functional HTML prototypes to test user flows and interactions without writing code from scratch.
The generated code is structured semantically, which is beneficial for SEO, and uses modern CSS practices like flexbox and grid for built-in responsiveness.
When to Choose Elementor Template JSON for WordPress
For those working within the WordPress ecosystem, the Elementor Template JSON output is incredibly powerful. This option generates a single JSON file that you can import directly into the Elementor page builder. The AI intelligently maps design elements to corresponding Elementor widgets, preserving styling, layout, and structure.
This workflow is perfect for:
- WordPress Developers: Drastically reduce the time it takes to build custom Elementor sites from Figma or Sketch designs.
- Marketing Teams: Quickly create and launch new landing pages on a WordPress site without needing to code.
- Agencies: Streamline the process of converting client designs into fully editable Elementor templates.
The result is a flexible, editable page within Elementor, giving you the speed of AI generation combined with the power of a leading page builder.
Advanced Techniques for Pixel-Perfect Results
While the AI is designed for high accuracy out of the box, complex designs can sometimes require additional guidance. Mastering these advanced techniques will help you achieve pixel-perfect results on even the most challenging conversions.
Leveraging AI Iterations to Improve Accuracy
As mentioned earlier, you can select the number of iterations the AI performs. Each iteration is a chance for the multi-agent system to self-correct and refine its output. For a simple design, one or two iterations may be sufficient. However, for a design with overlapping elements, complex gradients, or unconventional layouts, increasing the iteration count to three or more can lead to a significantly more accurate result. This is a powerful tool for fine-tuning the final code to match your vision precisely.
Using ‘Additional Instructions’ to Guide the AI
For even greater control, you can provide the AI with ‘Additional Instructions’. This feature allows you to give plain-text commands to guide the conversion process. For example, you could instruct the AI to ‘make the primary call-to-action button a brighter shade of blue’ or ‘ensure all body text uses the Inter font’. This conversational refinement workflow allows you to steer the AI’s focus and correct minor discrepancies without needing to edit the code manually.
Examples of Effective ‘Additional Instructions’
To make this feature more practical, here are some specific, copy-paste-ready commands you could provide to the AI for immediate and impactful refinements:
"Ensure all body text is 16px and uses the 'Inter' font.""Change the primary call-to-action button's background color to #5A67D8.""Increase the padding on the left and right sides of the main content area to 32px.""Make all images have a border-radius of 8px."
Best Practice: Converting Multi-Section Designs for Elementor
A key strategy to consider, especially for Elementor users, is converting large, multi-section designs piece by piece. Instead of uploading a single image of an entire long-scrolling homepage, it is more effective to crop and upload each major section (e.g., hero, features, testimonials, footer) individually. This approach offers several advantages:
Common Mistake: Avoid uploading a full screenshot that includes browser UI like scrollbars, tabs, or the address bar. Crop the image to contain only the webpage content itself for a more precise and error-free conversion.
- Improved AI Accuracy: The AI can focus its analysis on a smaller, more contained area, leading to cleaner widget mapping and more precise styling.
- Greater Flexibility: It results in separate Elementor templates for each section, which you can then easily arrange, re-order, and save as global blocks within your WordPress site.
- Simplified Editing: Managing smaller, modular sections within Elementor is far easier than editing one single, complex JSON import.
Understanding the Points System and Pricing
DesignToCodeAI utilizes a transparent, pay-as-you-go model built on ‘Power Points’. This system avoids monthly subscriptions, allowing you to pay only for what you actually use, which is ideal for both frequent and occasional users.
How the Pay-As-You-Go ‘Power Points’ System Works
Every code generation consumes a set number of Power Points. The cost typically ranges from 300 to 500 points, with the exact amount depending on the number of AI iterations you select for the conversion. More iterations mean a higher point cost but also a more refined output. You can purchase points in various bundles, known as Point Packs (Starter, Pro, and Power), to suit your usage needs. Points are tied to your account and do not expire. You can easily check our flexible pricing plans to find the pack that’s right for you.
Activating Your 500 Free Points on Signup
To ensure every new user can experience the platform’s full capabilities without commitment, DesignToCodeAI offers 500 free Power Points upon signup. This is typically enough for one or two standard conversions, allowing you to upload a design, generate code, and evaluate the quality of the output for yourself. No credit card is required to sign up and claim your free points.
Technical Deep Dive: Code Quality, SEO, and Privacy
Beyond speed and convenience, the quality of the output and the security of your data are paramount. DesignToCodeAI is built on a foundation of modern web standards and a strong commitment to user privacy.
Is the Generated Code Responsive and SEO-Friendly?
Yes. The AI is trained to produce code that adheres to current best practices. The generated HTML uses semantic tags (e.g., `<header>`, `<section>`, `<nav>`), which provide a clear structure for search engines and improve SEO. Furthermore, the styling relies on modern CSS techniques like flexbox and grid, ensuring that the layout is inherently responsive and adapts gracefully to different screen sizes, from mobile devices to desktops.
How DesignToCodeAI Ensures Your Data Stays Private
Data privacy is a core principle of the platform. According to the Privacy Policy, your intellectual property is treated with the utmost care. Neither your uploaded design files (images or URLs) nor the generated code outputs are ever stored permanently on the servers. The entire conversion process happens in-memory during your active session. All data is automatically and permanently deleted when your session ends, you refresh the page, or after 24 hours, whichever comes first. This ensures your designs remain confidential and secure.
Frequently Asked Questions
Here are answers to some common questions about how to use DesignToCodeAI and its features.
What types of designs can I convert with DesignToCodeAI?
You can upload design images or screenshots in PNG or JPG format, up to 20MB in size. This includes designs exported from tools like Figma, Adobe XD, or Sketch. You can also use a website URL as input for replication or redesign workflows.
How accurate is the AI code conversion?
The platform’s multi-agent AI system analyzes layout, styling, fonts, and components to achieve high, often pixel-perfect, accuracy. While most outputs are production-ready, complex designs may benefit from using the Iterations and ‘Additional Instructions’ features to further refine the results to your exact specifications.
If a generation fails, are my points refunded?
Yes, if a generation fails due to a technical error on the platform’s side, the Power Points used for that attempt are typically refunded to your account automatically. If you believe a refund was missed, you can contact the support team with the issue details for a prompt resolution.
Are my uploaded designs and generated code stored on your servers?
No. DesignToCodeAI operates on a strict no-storage policy for user uploads and generated code. All data is processed temporarily in volatile memory during your session and is permanently cleared when you exit or refresh the page, ensuring your intellectual property remains private and secure.
Have more questions? For a comprehensive list of answers, please visit our main FAQ page.
You now have a comprehensive understanding of how to use DesignToCodeAI to transform your creative visions into functional code. The platform is more than just a conversion tool; it’s a powerful accelerator for your entire development process. By bridging the gap between design and implementation, it frees you to focus on innovation and creativity. The best way to see the impact is to experience it firsthand. Get started today and use your 500 free points to bring your first design to life.